This is a very simple deployment process; you can probably even do it with GitHub Actions, which would be better because the CI/CD process would trigger directly after I make a commit, and I can commit individual files. The downside of my approach is that it uses git add ., which adds all files to the staging area, lol.
Previously
The way this website is hosted is pretty simple. I have an EC2 instance with NGINX installed on it, and it just hosts the static content of my website.
What I was doing initially was, anytime I made a change on my local machine, I would push the changes to the main branch, then SSH into my VM, go to /var/www/swarom.dev, pull the changes, and run npm run build. Now, this doesn’t sound like much and only takes about 2-3 minutes, but it was still quite annoying when I was making changes frequently.
So, I came up with this simple deployment process that works, and it’s just one line I have to run in my terminal: swarom.dev. This is just an alias and could have been anything, but anyway, I digress.
Currently
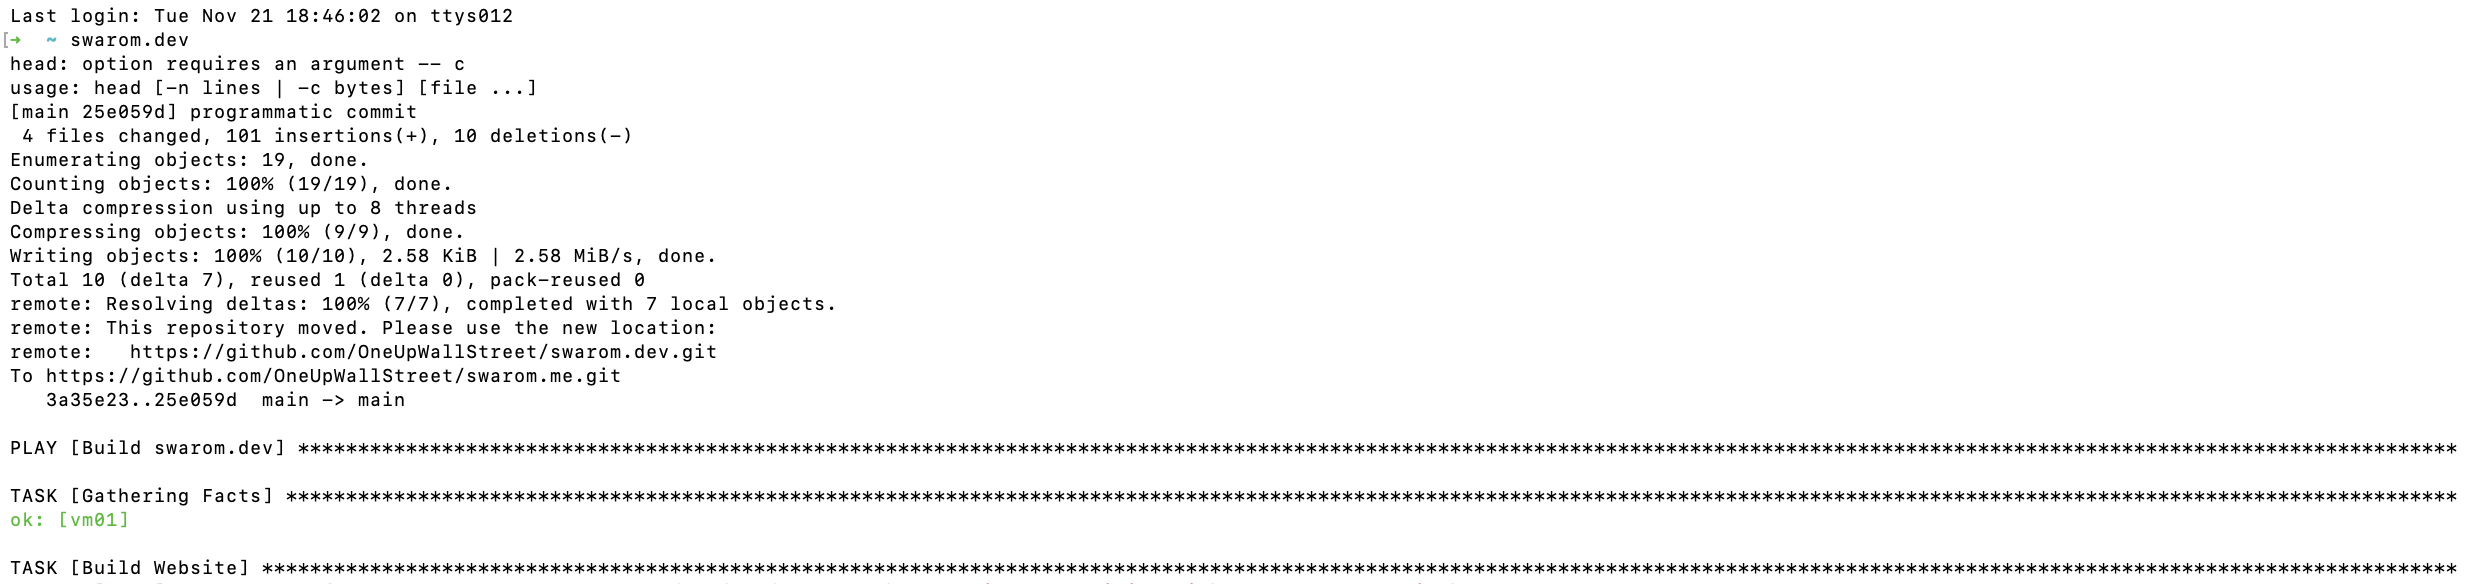
So, to automate this, I decided to go with Ansible. Why? Because I got to use it at my internship to help out a colleague, and honestly, I thought it was pretty cool. So, here’s what my deployment looks like:
- Trigger
swarom.dev - Shell Script Executes
- git push to main
- start ansible-playbook
- Ansible Playbook
- SSH into VM
- git pull from main
- npm run build
Let’s walk through the steps.
Trigger swarom.dev
This is super simple; it’s just an alias in my ./zshrc file. It just executes my run.sh file.
alias swarom.dev="bash /Users/Arteezy/Developer/swarom.dev-deployment/run.sh"Shell Script Executes
The shell script has just two main functions: to push all the current changes to the main branch and to start the ansible-playbook. Other than that, there’s nothing fancy going on.
# Change directory to the first project directory
cd /Users/Arteezy/Developer/swarom.me

# Add all changes to git
git add .

# Commit the changes
git commit -m "programmatic commit $random_string"

# Push the changes to the main branch
git push origin main

# Change directory to the deployment directory
cd /Users/Arteezy/Developer/swarom.dev-deployment

# Run the ansible playbook
ansible-playbook playbook.yaml --inventory inventory.yaml
Ansible Playbook
The inventory.yaml file contains the details of how to access the VM where the server is located, as well as the path to the private key, so that Ansible can SSH into the machine.
# Just an example of how my inventory.yaml file looks.
virtualmachines:
hosts:
vm01:
ansible_host: 192.168.255.255
ansible_ssh_user: ubuntu
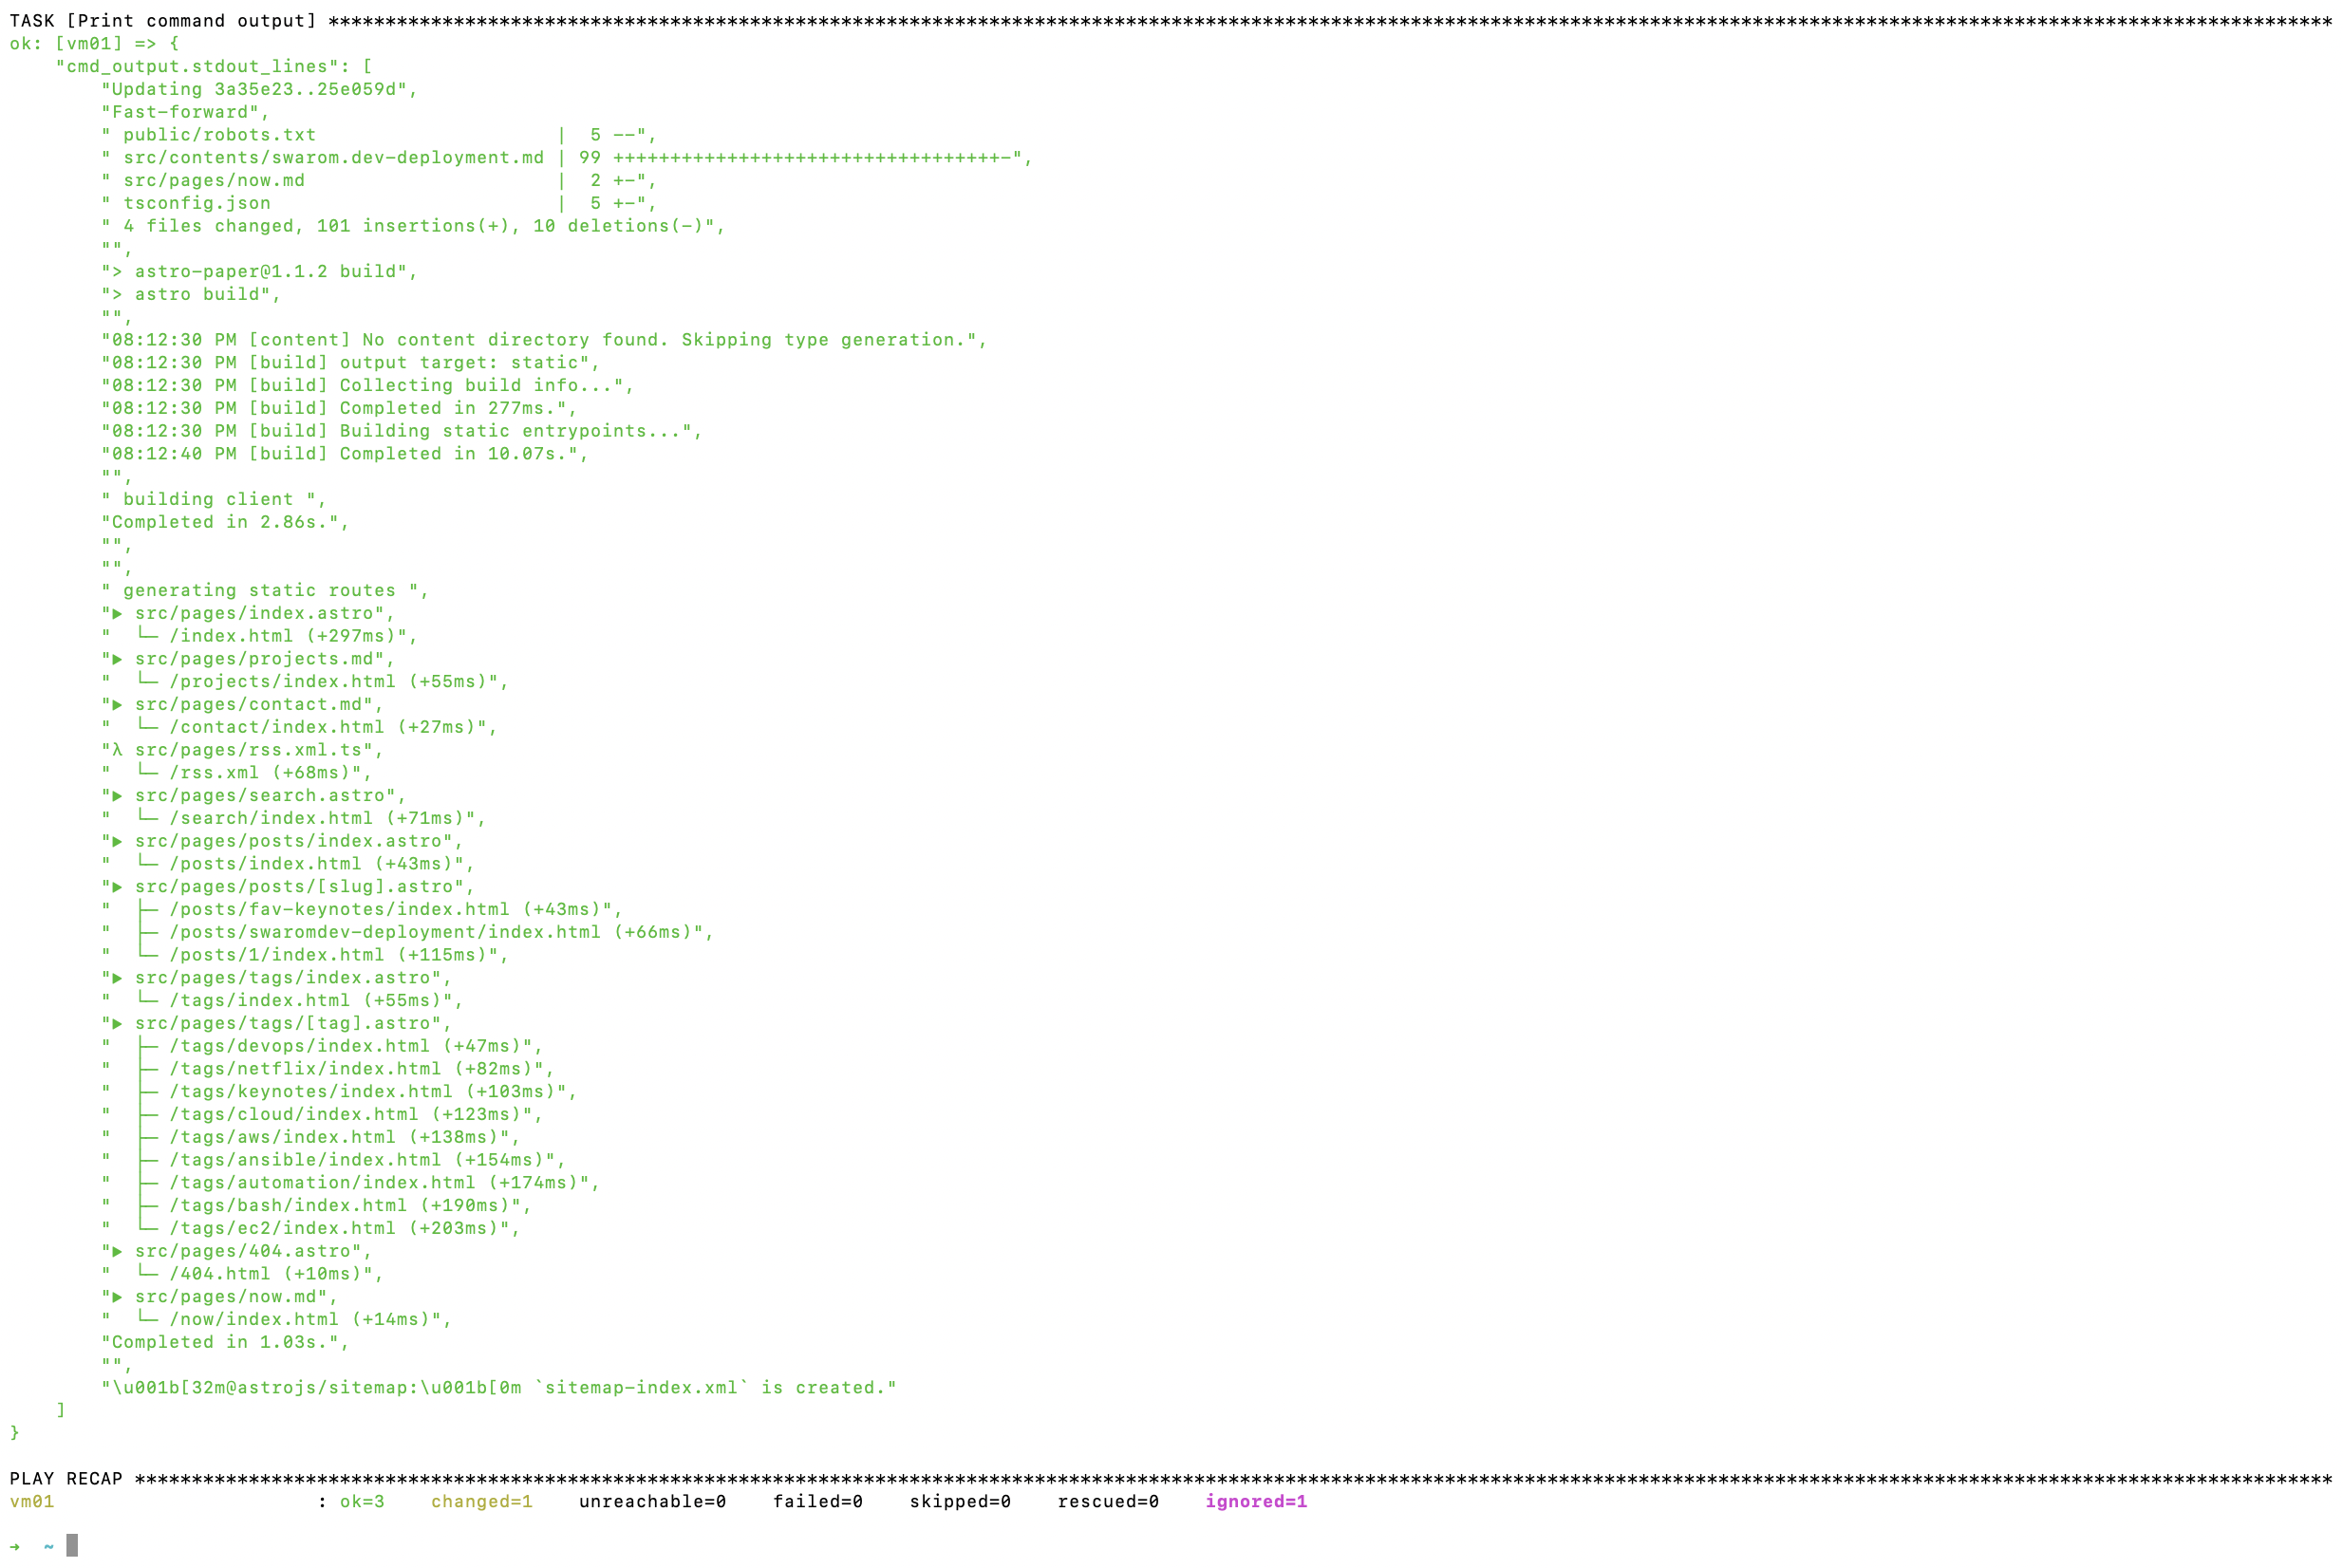
ansible_ssh_private_key_file: /Users/Arteezy/Developer/swarom.dev-deployment/swarom-website.pemThe Ansible playbook is very similar to the shell script, lol. It just SSHs into the server, pulls the changes from the main branch, and runs npm run build, and then NGINX automatically updates the website.
- name: Build swarom.dev
  # The host information is stored in inventory.yaml
  hosts: virtualmachines
  tasks:
    - name: Build Website
      # Shell script basically automates what I was doing manually every time
      shell: |
        cd /var/www/swarom.me
        sudo git pull origin main
        sudo npm run build
      register: cmd_output
      # Some browser tests fail in the VM because it lacks access to them.
      # I need to address this issue, but for now.
      # I'm ignoring those errors as they are not relevant
      ignore_errors: true
    - name: Print command output
      debug:
        var: cmd_output.stdout_lines
The process is pretty simple, and I put it together in about 30 minutes, but it works for now. But like I said earlier, GitHub Actions is a better way of doing this, because then you can work with individual commits instead of just pushing every change to the main branch. Anyway, thanks for reading this. Have a nice day!
The code’s here btw OneUpWallStreet/swarom.dev-deployment
Console Output Example